2016/12/11 Slackware 14.2
This install was done on a Virtual Machine (VirtualBox 5.02) so it includes installing the VBox Guest Additions.
slackware64-14.2-install-dvd.iso
+boot the DVD +hit
+prepare the harddisk
+I used the blkid command to list all the disks but interestingly it did not list the harddisk only the CDROM
# blkid
/dev/sr0: UUID="2016-06-30-18-21-58-24" LABLE="SlackDVD" TYPE="iso9660"
   PTUUID="5f274497" PTTYPE="dos"
+lets try fdisk
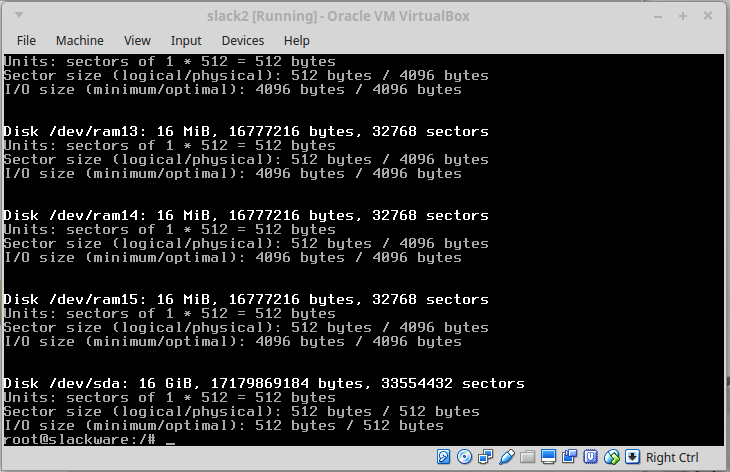
# fdisk -l
+after the 16 RAM disks we can see the harddisk is called /dev/sda
+Use fdisk to partition the disk. I am not using a swap partition so in my case I just used the entire disk as one partition.
# fdisk /dev/sda
    n - for new
    p - for primary
    1 - for partition number
    <enter> - default first sector
    <enter> - default last sector
    w - for write
+now we run the setup program
# setup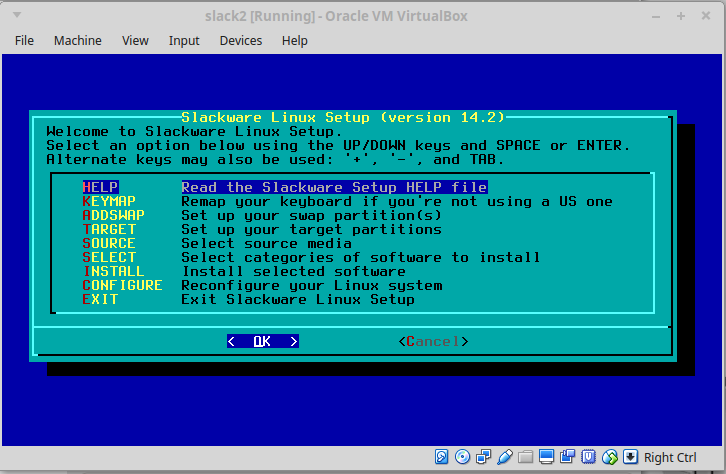
+in my case I did not read HELP, or need to change the KEYMAP or use ADDSWAP
+select TARGET to start the install.
    TARGET - <enter> to start
    Select Linux Installation partitiion - /dev/sda1
    FORMAT - Format for quick format
      /dev/sda1 - picked this one
      ext4  - I always use Ext4
    ADDING LINUX PARTITION TO /etc/fstab - <OK>
+and with that the disk is ready, on to installing the software
    SOURCE MEDIA SELECTION - DVD <OK>
    SCANNING FOR DVD DRIVE - auto scan <OK>
    PACKAGE SERIES SELECTION  - I de-selected a couple bits
        GNU Emacs - VIM forever!!!
        KDE       - not my cup of tea
        TeX       - no typesetting required
    SELECT PROMPTING MODE - select "full" and <OK>
+and wait for a bit whiile the software is installed
+now we have a few configuration prompts
MAKE USB FLASH BOOT - select "Skip" <OK>
INSTALL LILO - select "simple" <OK>
CONFIGURE LILO TO USE FRAME BUFFER CONSOLE - select "standard" <OK>
OPTIONAL LILO kernal parameters - leave blank <OK>
USE UTF-8 TEXT CONSOLES - safe answer <No>
SELECT LILO DESTINATION - Install to Master Boot Record <OK>
MOUSE CONFIGURITION - imps2 <OK>
GMP CONFIGURATION - load gmp at boot <Yes>
CONFIGURE NETWORK - <Yes>
ENTER HOSTNAME - slackvm <OK>
ENTER DOMAINNAME - lockett.ca <OK>
CONFIGURE TYPE FOR - DHCP <OK>
SET DHCP HOSTNAME - leave blank <OK>
CONFIRM SETUP COMPLETE - <Yes>
CONFIRM STARTUP SERVICES TO RUN - take the defaults, select <OK>
CONSOLE FONT CONFIGURATION - take the default <No>
HARDWARE CLOCK SET TO UTC - take the default NO <OK>
TIMEZONE CONFIGURATION - in my case Canada/Atlantic <OK>
SELECT DEFAULT WINDOW MANAGER - xinitrc.fluxbox <OK>
NO ROOT PASSWORD - <Yes> to set a password
SETUP COMPELETE - <OK>
+and the last step, select EXIT, remove the DVD and reboot
+enjoy your new Slackware
+update the software
# cd /etc/slackpkg
# vi mirrors
    ..... uncomment your favorite mirror site
# slackpkg update gpg
# slackpkg update
# slackpkg install-new
# slackpkg upgrade-all+need to add a regular user account using the "adduser" command # adduser
    -user name: i.e. john
    -userid: <enter> for next available
    -initial group: <enter> for default of "users"
    -additional groups: <up arrow> to get default list
        audio cdroom floppy plugdev video power netdev lp scanner
        ... add wheel to the list
        audio cdroom floppy plugdev video power netdev lp scanner wheel
    -home directory: <enter> for default i.e. "/home/john"
    -shell: <enter> for default "/bin/bash"
    -expiry date: <enter> for never
    -new account review: <enter> to make the account
        .... Creating New Account

    -Other User Information
        Full Name []: <enter>
        Room Number []: <enter>
        Work Phone []: <enter>
        Home Phone []: <enter>
        Other []: <enter>

-and finally set the account passwordAnd, with a startx you now have a very plain but working fluxbox setup.

If you are not using VirtualBox you can skip this step.
+I am useing VirtualBox 5.0.2 and it comes with VBox Guest Additions 5.04. I have found 5.0.4 did not support resizing the screen under my host OS (Linux Mint 17.2). I downloaded newer version 5.0.30 of Guest Additions at the Oracle website.
Guest Additions
There were newer 5.1.x versions available, but my guess was that I should not mix 5.0 Virtual Box host with 5.1 Guest Additions.
+Insert the VBoxGuestAdditions_5.0.30.iso into the VMs CDROM. +find the name of the with the "blkid" command, in my case it was /dev/sr0 + mount the CD
# mount /dev/sr0 /mnt/cdrom+install the guest additions
# cd /mnt/cdrom
# ./VBoxLinuxAdditions.run
+And, it fails, cannot find the headers for the current kernal. I forgot to reboot after the upgrade. +reboot, logon as root, mount CD to /mnt/cdrom, execute VBoxLinuxAdditions.run, watch the output to make sure there are no errors, and reboot
+Interestingly the screen resolution will not adjust when you resize the window like my other linux VMs. We have to adjust the resolution using xrandr. $ xrandr --output VGA-1 --mode 1750x960 $ xrandr --output VGA-1 --mode 1650x960 $ xrandr --output VGA-1 --mode 1280x960
Installation Complete!!